Tuesday, January 3, 2012

Anything Lost can be Found Again

2011 has been a tough 1st year in business.  Lots of people are hurting in the pocket book and it is sinking in that riches might not be abundant anytime soon.  It is going to take buckling down hard work to recover, not just some quick government bailout.  The markets aren’t going to just bounce back and return us our foreclosed homes.  We’ll have to lose our mail on Saturdays, consider closing a few schools here and there, cut funding that might help people, and watch our taxes go up in the process.  We know this now not just from what warnings we have heeded from news or state of union addresses but from experience.  Saving has become a luxury that only those who have can afford to do.  Sustainability is more than just a catch phrase it is something to be sought after and lived in every fashion possible.  For a couple of the busiest months of the summer I was bidding jobs as low as I could just to stay in business because the competition was so fierce that I had to for survival.  I was saying yes to projects outside of my comfort zone that ideally I would let go to someone else and I was completing them regardless for as little as I could.  It was hard for me to remain grateful as Thanksgiving approached.  Then a client asked me to do something out of the ordinary, away from the main stream.  She presented me an exhausted bed frame and asked me if it could be made into a bench.  This thought was, perfectly against the grain, just like me.  Though scarce, there is hope.


The bed was a pretty piece in its day, but would likely never be a suitable furniture item again for two big reasons.  The joints were weakening and the panels were starting to fall out.  That first issue could be resolved but the second issue really forced a question of value to the forefront.  The size of it was out of date with current mattress sizes.  It would be too big for a full size, yet too small for a queen.  I am sure it was just right when it was built but not anymore.  Like an education in any industry that involves technology from the past, computer or phone it just wasn’t compatible anymore.  Though an obsolete bed frame and starting to fatigue, I could see why it could be desirable as more than just firewood.  It would only be unsuitable if keeping the status quo, but a bench?  The potential was breathtaking.  The posts were partly carved and partly turned.  The panel work had carvings on it as well.  The footboard had a matching carved panel that if removed and resized carefully would make a perfect drawer face.  The top of the headboard had a chunky flat sawn dentil border with more carvings on it.  All of it was a rich black ash.  The whole work was a wonderful combination of rustic and regal.  “Yes!” I said enthusiastically thinking that making it into a bench for a front entry would be a perfect look for such a magnificently built frame.  How to change its joint work and keep its structure took some ingenuity, careful planning and there was no room for error.  I only had one chance to get the new design and reworking right.  I did make a few new pieces with matching custom woodwork for the sides, only because they never existed in the first place or I would have tried to save them too.  


Creating the idea, I give all the credit to my client who was the real genius in this project.  I have seen broken step ladders and suitcases made into furniture.  I have seen all sorts of discarded things transformed to something relatively useful.  I am hoping with crossed fingers this is the first step toward a new renaissance.  Unfortunately, most of these new salvage trendy rescues, I feel, will be the hot topic for a brief period but lose appeal after a little time passes.  Who will want to look at the same old piece of luggage reworked into a hip chair or coffee table?  There is only so long oddities can sustain themselves as conversation pieces.  Also, anyone can find a post modern storage made of particle board at IKEA and it will serve for a handful of years.  The vision of this more subtle transformation is visually appealing, incredibly useful, will remain structurally sound for half a century or more and is inconspicuous enough that most people will never even know that it used to be a bed.  Materials were minimal.  Nothing was wasted.  The end product will remain and continue to serve in its newly found life.  This was truly a brilliant idea. 


After college the world changed and discarded most of my skills in a career I had been honing with scary precision for nearly a decade.  The world got up and changed and outgrew a lovely piece of furniture that someone found too beautiful to let it be thrown away.  There is no way to know how many people walked past this old bed without a second thought.  Other artisans turned the project down, uncertain how to make the idea a reality.  I jumped on board with certainty that anything that gets lost can be found again.  Another tough year is behind us and new days are ahead.  I’ll always see a reflection of my own history when I see this transforming restoration project in my portfolio.  Surely, the bench and all of us adjusting to new ways will see lots of shoes and witness wonderful miles on them in the years to come.

Friday, October 21, 2011

Don't Rush into Gold

Why is it important to spend quality time with color selection?


Color is as powerful attribute to ambiance as music is to a dance hall. Color is one of the most fulfilling elements in our lives. Color can change your mood, it can draw attention or it can camouflage and protect. It speaks to who you are, how you feel and where you're going.  Here are three more good arguments.

1 Color can unite unique rare accent pieces with standard mass produced items in your home.
2 Intense hues that shine of boldness can add spirit to spaces that also feature more grounded elements like wood, wrought iron or woven textiles.
3 Negative space gains a glimmer of happiness with the enhancement of bright colors.

Hue
the property of light by which the color of an object is classified as red, blue, green, or yellow in reference to the spectrum.

Spectrum
this band or series of colors together with extensions at the ends that are not visible to the eye, but that can be studied by means of photography, heat effects, etc., and that are produced by the dispersion of radiant energy other than ordinary light rays.

Value
When in reference to fine arts=  a. degree of lightness or darkness in a color. b. the relation of light and shade in a painting, drawing, or the like.


So how do we complete the complex task of choosing a brilliant color scheme? 

Erase everything from your mind but that which stays

Determine what features or existing elements of the space you would consider permanent.  For example: the bricks and/or stucco, or the fine Italian sofa you got as a wedding gift or anything that is staying put  and that has spatial value within the scope of vision in the project you are looking at.  The colors you select must work well with these elements as well as with themselves.

Determine a point of focus

There are things about your project that you would want to see naked and things that don’t give the space any definition at all.  Emphasize your project's attractive features, like an arch or a crown molding.  You can draw more attention to these details by  means of contrast.  If there isn't much to work with you can create interest by adding a border.

Simplicity creates flow

Once you have created you color palette, continue the theme around the house without deviation.  This doesn’t mean every area has to look identical, but if you deviate from your palette you will lose that which ties the entire home together. 

Don’t finalize your selection at 11 AM on Saturday morning

I realize that the week is busy and that projects get accomplished when there is time.  If you start looking at colors when you get up on Saturday morning and have them chosen before lunchtime, you might get lucky, but you might find out the hard way that you didn’t take enough time with your color palette.  When the sun is in the west it creates a completely different look as it does in the morning.  The same goes with your artificial light after dark.  You might find that the brown you chose that looks so full and rich at midday turns black at night.  You might find that the wonderful blue you selected that was so calming and crisp in the morning only turns mottled and bland in the evening.  Spend at least twenty four hours before purchasing multiple gallons of paint.  Look at your colors in every light possible.  Another note I should add here is make sure you like the color from every angle at the various times of day you view them.  Some hues can change by entire shades of value on different walls.  A slightly more challenging imagination gag is that small blotches of color can appear different when finished if it is a grand space like an entire room from floor to ceiling or the color of the siding on an exterior.  Even what is considered an overwhelming color in small proportions can soften in a large surface and sometimes vice-versa.  Something rich in small amounts can become bland in large amounts.  Now I probably have you really confused. 

The most important thing when deciding colors is will you be satisfied with it for years to come.  What is hot this year may become old news next year.  Choose colors by your overall taste in what represents you at your core, not just what you are attracted to right now, unless you want to repaint every other year.  There is nothing wrong with wanting changes often if you have the means.  Most of us don’t though, which is why it is so important for us to take the time and energy to really consider our colors.  It is the most underrated aspect of any project because we all get excited about it but few of us really know how to do it right. 

Creating a tasteful color scheme can add so much value to your home.  I have seen lovely sturdy homes sit on the market unsold with mediocre curb appeal while neighboring homes in need of repair but tastefully colored sell immediately.  Only about 5% of the houses have a well selected color scheme.  I am not saying that it is going to bump your square footage up and increase your value by twenty thousand dollars, but if you decided to put it on the market right now, as it stands, would potential buyers stop and stare in the street pondering the idea or walk tucking a brochure into the enormous pile that they have already collected?  That makes for a huge difference in value.  And if you aren’t considering selling, it sure feels nice to have the pretty house on the block to come home to.

Thursday, September 8, 2011

Window Restoration


For the homeowners and the craftsmen alike an incredibly valuable skill to learn is window glazing.  I can’t stress enough how valuable it is.  So many contractors will come to do an inspection and see a hint of rot or glaze that is cracking and falling out and say, “Oh yes, you definitely need new windows”  Suddenly you will be looking at between one and two thousand dollars per average sized window that definitely needs to be replaced.  Some of you may have already caught my “do it yourself wood rot blog.”  That goes for windows too.  It is the same procedure and you will usually find rot in the corner of the bottom rail where it meets the stile.  I should probably explain the parts, huh. The top rail and the bottom rail are what they sound like.  It is the piece of wood at the top or the bottom of the window.  The stiles are the pieces of wood on the left or right.  The glass is surrounded by rails and stiles.  They hug the windowpane(s).  If there are divided panes the wood in between are called muntins.  Okay back on topic:  The point I can’t stress enough is that if you have the time to do home projects, doing this yourself can potentially save thousands upon thousands of dollars.  Ready?


All you will need for supplies is matching paint, an oil based primer, a good putty knife or two, and window glaze.  All this shouldn’t come to more than about a hundred dollars. 


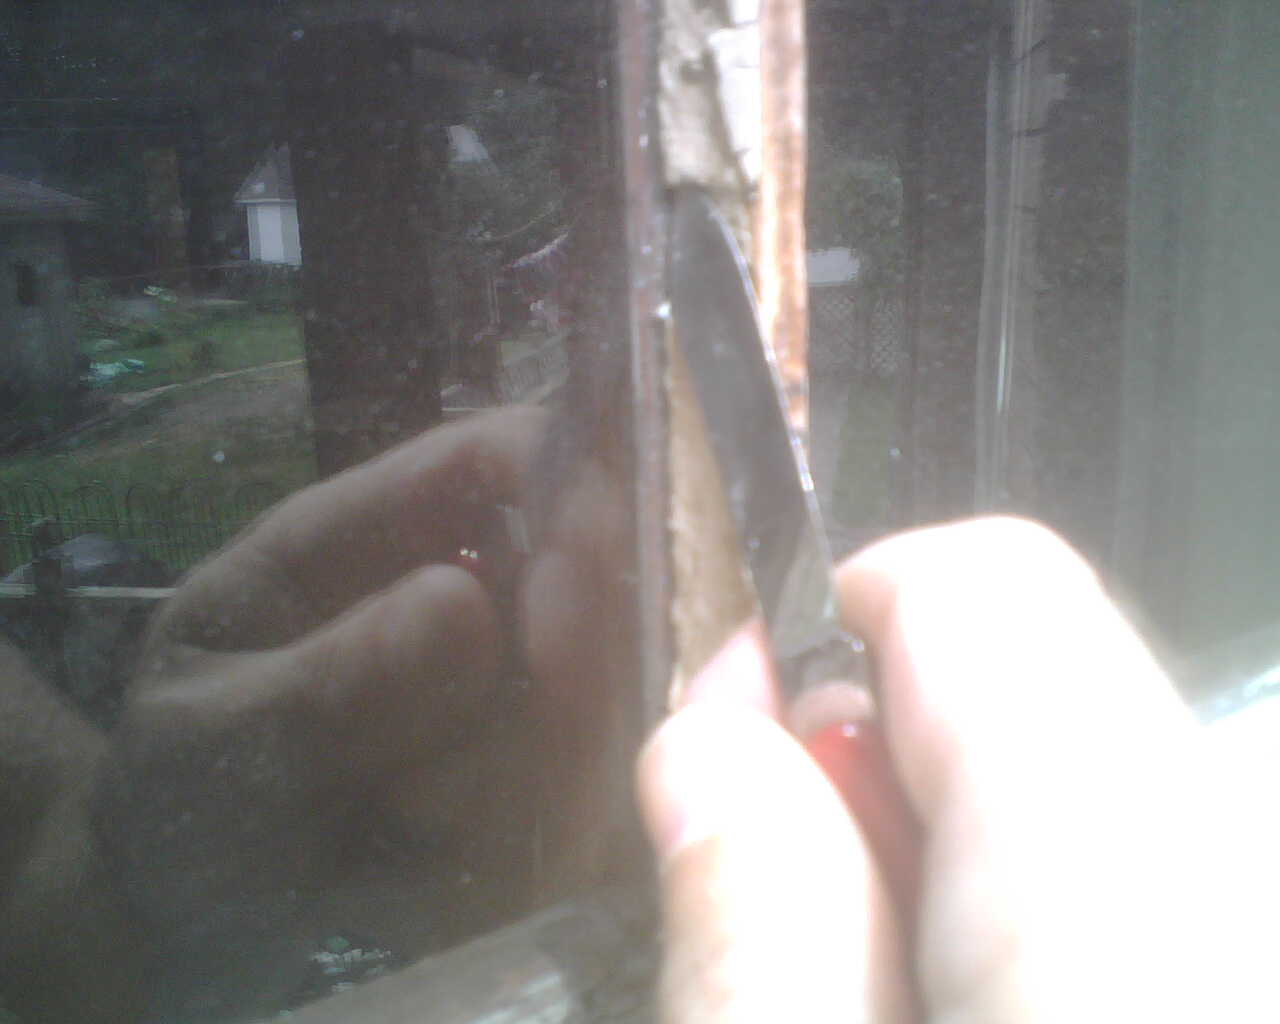
The first thing to do is examine physically the old glaze.  You can do this with the corner of a putty knife, but I use a cheap, old beater pocket knife for this because I find that the rigid triangular shaped point is a bit more effective.  What you want to do is prod a crack and see if it pops loose even a little bit.  Then pick at it until it all falls out.  If it is hard and adhered well enough, just leave it in.  If you can get under it, pick it out.  It is best to stay between the wood and the glaze and not the glass and the glaze.  You can, but, be careful.  The only thing keeping this job inexpensive is your care not to break the glass.  If you put pressure on the glass itself, you could crack it and believe me, it will happen on occasion and when it does, it is heartbreaking.  It is even more heartbreaking if it is old wavy glass.  **uncommon knowledge Old wavy glass is not flawed from years of distortion.  Those are imperfections of the glass being made by human hands that have been there since the birth of that pane of glass.  No two are alike.  They don’t make them with personality any more.**  After all the loose glaze is out, dust or vacuum really well.  Get the surface free of debris. 


You can use the oil based primer to seal the newly exposed surface of the chipped glaze and dried wood frame next to the window.  I like to use a general wood sealer that also works with glaze just because it has a faster dry time and when I am out on the jobsite I have to keep moving. 


Glaze is not expensive at all but it takes a delicately intuitive touch to work with it and a little knowledge about it could guide your hand.  It is both temperature and moisture sensitive.  It is an oil based product and it flows through it so there will be portions that are stickier than others and want to smear all over.  One trick I learned from my mentor that helped me greatly was the starch trick.  A sprinkle rubbed into the palms of your hand will make a damp, sticky, separating glaze, much more manageable.  Don’t use too much or your new glaze line wont seal the window properly.  It needs to remain a little bit sticky. 


If it is cold it will be hard and not easily workable.  On a hot day this step will go very fast and might not even be necessary.  Knead it.  Like dough.  Smash it, and work it.  Roll it into a ball.  Do this as much as necessary for it to become soft and mushy.


Between your palms pinch roll it by pressing it back and forth between the heels of your palms so that it snakes out.  I usually aim for roughly a quarter inch diameter snake.  This is roughly the volume per inch of a good glaze line plus excess for cutting, but we’ll get to that in a bit.


Lay the snake into the crack between the wood and the glass gently pressing it in with a thumb or finger.  If it isn’t sticky enough because you used too much cornstarch on your hands this is when you will discover it.  If it doesn’t want to stick start over and make it again slightly stickier.  If you force it in with out it naturally sticky it won’t last very long.  It should stick and dry that way.  That stickiness is the glue that bonds it all together.  The starch is good for making it manageable when it is too sticky to work with, so you can get away with some, but if you over-indulge your work will show it in the years to come.


Put the blade of the putty knife against the glass laying it flat on the bead of glaze you laid out.  Press the glaze in hard.  It should squirt out from under the edge of the knife a bit as you do this.  I like to overlap each new blade press by about half a blade width for consistency and to make damn sure I got it all in there really good without missing any spots.  You want to be able to imagine that you left no open pockets unfilled with the glaze underneath the surface.  The squirting of it from under the blade as you retract away id a good indicator that the material had nowhere else left to go but out from under the knife.  This is by far the most crucial and exhausting part of glazing.  If your forearms aren’t sore by the time you are done with a pane of glass, you weren’t doing it right.  I do this all the time and mine still get tired from it. 


Now to make it look clean it is all about the correct angle.  You will need your putty knife and a steady hand.  I dig the corner in gradually until I find the edge of the wooden rabbet that was cut for the cavity of the window on the opposite side of the glass.  That is the line you want to follow.  It is straight and in just the right spot.  The top of the blade should rest right on the wood edge on the face of the window.  The blade should be as flat as possible laying parallel to the cut line.  Press down in that position and drag it keeping an eye on the corner of your knife.  You are freehand cutting it and tracing that line on the underside of the glass.  There should be a smash-like cut at the face edge of the glaze and a slice cut at the glass edge, both leaving a small wrinkly cut line of excess glaze material.  This might take some practice, but you know what?  It is no big deal because glaze has a working time of several days so if it doesn’t work you can dig it out and do it all over again with no waste other than some time.


After you get a good cut you will carefully scoop away the excess with your putty knife.  If you accidentally dig out your glaze, well bummer, but just press it back in and cut again.  If you merely nick it, don’t sweat it unless you are an anal perfectionist.  I can relate.  Only if I am in a real hurry will I not fix this by doing it over. 


I also will sometimes use the excess as a woodfiller in little cracks and flaws since I have it out.  There is no harm in filling a crack.  Glaze was the wood filler of the old craftsmen before manufacturers started making advanced products.  Works perfectly well too.  The only reason I wouldn’t use I in any other situation is the setting time.  But since we are already waiting for it anyway, just fill it with glaze.


Another trick is to put another dab of starch in your hands and ever so gently massage the line with your finger tip, by dragging out any tiny flaws.  Glaze is extremely malleable so why not take advantage of that?  I even do this to smooth out the vibration ripples from the blade not moving perfectly smoothly when cutting. 


In the places where there was still old glaze that was sealed well and didn't want to come out, just do the best you can to blend it smooth.  It will not be nice and perfect but trying to get it out just isn't worth your time.  The painting should suffice covering up any imperfections in your glaze line.

The glaze needs to set up.  Remember the working time of this stuff is days.  I like to wait two weeks to paint.  First, seal in the oils by painting the glaze with the oil primer.  After that is dry, paint with your window color in latex or whatever you have for your windows.  I cut my lines by hand but you can do it however you want.  But, just so you know.  You want the paint to just touch the glass.  Extend your paint line, just a hair, maybe like a thirty second of an inch beyond the glaze so that it is just touching the glass.  Creating that final line seals the glaze in and will make your window repair last much longer and now your window should look about as good as new.